 Save to Pinterest
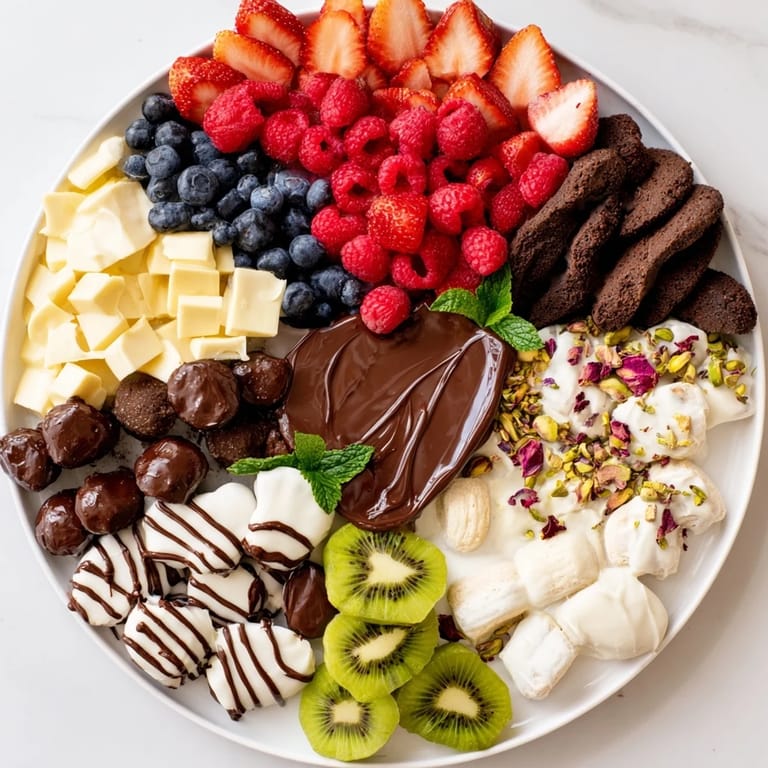
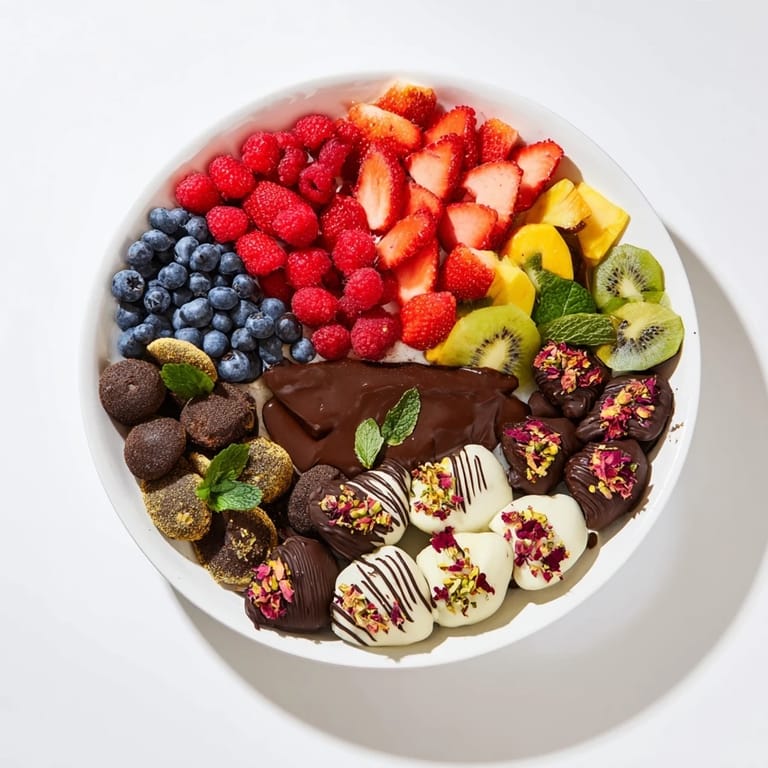
 I'll never forget the first time I assembled a dessert platter for a dinner party—I was nervous, thinking it had to be complicated. But then I realized that the magic wasn't in the cooking; it was in the curation and presentation. A stunning dessert board is like painting with flavors and textures, where every element gets to shine. That evening, watching my guests' faces light up as they saw this symphony of chocolates, fruits, and sweets arranged in perfect symmetry completely changed how I think about entertaining. It's not about stress—it's about creating a moment of pure indulgence that feels both effortless and extraordinary.
I made this for my sister's birthday last spring, and honestly, it became the talk of the celebration. She's always been the fancy one, but seeing her genuinely impressed—and watching her friends Instagram the board before eating anything—that's when I knew I'd discovered something special. The best part? She asked me to make it again for her book club, and now it's become my signature move.
Ingredients
- Strawberries (1 cup, halved): These are your anchor fruit—choose the ripest, most fragrant ones you can find. Halving them lets people grab them easily and shows off that gorgeous red interior
- Blueberries (1 cup): They stay whole and roll perfectly into gaps, plus their deep blue creates beautiful color contrast. Pro move: use them to fill spaces at the last second
- Raspberries (1 cup): Handle these gently—they're delicate jewels. I learned to add them last because they bruise if you fuss with them too much
- Kiwis (2, peeled and sliced): The bright green is essential for visual pop. Slice them about ¼-inch thick so they don't fall apart when people pick them up
- Mango (1, peeled and cubed): This adds a tropical sweetness that balances the rich chocolate. Choose one that yields slightly to pressure but isn't mushy
- Assorted Truffles (1 cup): These are your luxury element—they tell guests this is special. Mix flavors and coatings for visual interest
- Chocolate-Covered Almonds (1 cup): They add crunch and sophistication. I love that they stay crisp even hours later
- Mini Brownies or Brownie Bites (1 cup): Buy quality ones if you're not making them yourself. They're the bridge between chocolate and substance
- Assorted Macarons (1 cup): These are your showstoppers for color and elegance. Different flavors create conversation pieces
- Shortbread or Butter Cookies (1 cup): These fill gaps and add texture variety. I use them strategically to balance heavier elements
- Dark Chocolate Chips (1 cup, for melting): The drizzle is everything. Use chips that melt smoothly—quality matters here because it's so visible
- White Chocolate Chips (½ cup, for melting): The contrast between dark and white chocolate drizzles is what makes this board photograph like a dream
- Chopped Pistachios (2 tablespoons): Their vibrant green and subtle earthiness elevate the entire board. Toast them lightly first if you have time—it deepens the flavor
- Dried Rose Petals (2 tablespoons, optional): This is the detail that makes people think you're a genius. They add romance and visual texture
- Fresh Mint Leaves (for garnish): They stay fresh longer than you'd think and add a pop of living green. I pick them just before serving
Tired of Takeout? 🥡
Get 10 meals you can make faster than delivery arrives. Seriously.
One email. No spam. Unsubscribe anytime.
Instructions
- Gather Your Canvas:
- Find the largest, most beautiful serving board or platter you own—this is your stage. Clear a clean workspace and lay out all your ingredients in small bowls or arranged neatly. I like to do this step with intention, almost like I'm preparing for a performance. Having everything visible helps you see the color story before you even start arranging
- Prepare Your Fruits with Care:
- Rinse all fruits gently and pat them completely dry—this prevents the board from getting soggy and keeps everything looking pristine. Slice the strawberries in half lengthwise to show off their pretty interior. Peel and slice the kiwis into thin, even rounds. Cut the mango into cubes, holding it firm in your hand. The blueberries and raspberries stay whole—treat them like little jewels. As you finish each fruit, mentally note where it might go on your board
- Melt Your Chocolate Like You Mean It:
- Divide the dark and white chocolate chips into two separate microwave-safe bowls. Heat each for 30 seconds, stir completely, and repeat if needed. The chocolate should be smooth and pourable, not grainy or separated. I use this moment to take a breath—the smell of melting chocolate is pure comfort. If using a double boiler, go slowly and watch it carefully. Neither method is faster; it's just about which feels right in your kitchen
- Build Your Masterpiece with Intention:
- This is where the magic happens. Start by arranging fruits in symmetrical layers on opposite sides of the board—imagine you're creating a mirror image. Picture fresh strawberry halves in one corner, then kiwi slices in the opposite corner. The visual balance is what makes this work. Now place your chocolates and sweets: truffles in neat rows, macarons in alternating circles, brownies creating structure. Think about color distribution—don't cluster all the dark chocolates in one spot. Step back and look at it from different angles as you work
- Fill the Gaps with Intention:
- This is where cookies and chocolate-covered almonds become your best friends. They're perfect for filling empty spaces while maintaining visual harmony. Arrange them in small clusters rather than scattered randomly. I like to think of this as the finishing touches on a painting—each placement matters
- Drizzle with Confidence:
- Once your board is arranged exactly how you want it, it's time for the chocolate drizzle that makes this spectacular. Using a spoon, fork, or piping bag, create graceful lines of dark chocolate across the board—think of abstract brush strokes. Then do the same with white chocolate, creating contrast and movement. I like to let the drizzles overlap slightly, creating visual interest. Some of my drizzles are thin and delicate; others are more generous. There's no wrong way—trust your instincts
- Final Flourishes:
- Sprinkle the chopped pistachios over the top with a light hand—you want scattered elegance, not a covering. Add the dried rose petals if using them, focusing on areas that need a pop of color. Tuck fresh mint leaves into gaps and around the fruits. Step back and admire your work. This is the moment when you realize you've created something genuinely beautiful
- Serve with Pride:
- You can serve immediately while the chocolate drizzle is still slightly tacky, which creates a beautiful sheen, or refrigerate until ready. If refrigerating, cover loosely with plastic wrap to prevent the board from drying out. When it's time to bring it to the table, do it with confidence—you've earned the admiration
 Save to Pinterest
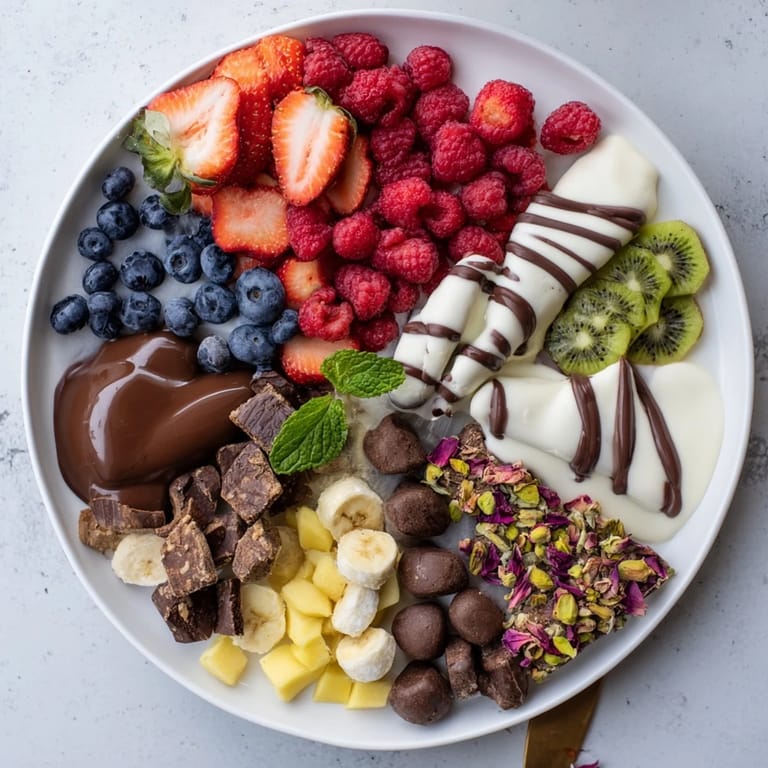
 What struck me most wasn't just that this dessert board was beautiful—it was how it brought people together in a different way. Usually, dessert is something I finish alone, but this board became a communal moment. Everyone gathered around, debated which macaron to try first, and lingered over their choices. It transformed dessert from an ending into an experience, and suddenly entertaining felt less about perfection and more about connection.
The Art of Balance
Creating a dessert board is really about understanding balance—not just visual balance, but flavor and texture balance too. You need the brightness of fresh berries cutting through rich chocolate, the crunch of cookies against creamy macarons, and the delicate rose petals adding sophistication without overwhelming. I've learned that the most stunning boards aren't the ones with the most items; they're the ones where each element earns its place. Think about what textures make your mouth happy, what flavors complement each other, and how colors tell a story on the board. This isn't just assembly—it's composition.
Timing and Temperature
The beauty of this board is its flexibility with timing. You can prep everything hours ahead—wash fruits, slice them, melt chocolate, arrange all the sweets—and then do the final assembly just before serving. The chocolate drizzle looks most stunning when it's still slightly warm, so timing that last is important. If you're making this for a party, I recommend assembling it no more than 30 minutes before serving. The board stays fresh and beautiful, and you avoid any fruit oxidation. Refrigerating works too, but room-temperature chocolate drizzles have a glossier finish that photographs beautifully.
Making It Your Own
One of the greatest joys of a dessert board is that it's endlessly customizable. Season changes? Swap in grapes in fall or apple slices in winter. Guest with allergies? Replace the pistachios with coconut flakes or omit nuts entirely. Want it gluten-free? The board adapts beautifully—use gluten-free cookies and brownies without losing any impact. I've made this board with seasonal fruit, different chocolates, alternative nuts, and each time it feels fresh. The structure and spirit stay the same; the details become your signature. This flexibility is why I keep coming back to this recipe—it never feels repetitive because I'm always discovering new combinations and flavor stories.
- Try different colored macarons based on the season or occasion for instant visual cohesion
- Keep extra chocolate chips on hand so you can add more drizzle if the first layer doesn't feel dramatic enough
- Arrange everything on your board about 15 minutes before serving so flavors can settle and the presentation stays perfect
 Save to Pinterest
 A dessert board like this has become my go-to for moments when I want to feel elegant without stress. It's the recipe that reminds me that the most impressive entertaining often comes from simplicity and thoughtful curation rather than hours spent at the stove.
Recipe Q&A
- → How can I keep the fruits fresh while assembling the platter?
Use fresh, firm fruits and slice just before assembly. Keep them refrigerated and dry to retain freshness and avoid sogginess.
- → What is the best way to melt dark and white chocolate smoothly?
Melt chocolates in microwave-safe bowls in 30-second intervals, stirring between each until smooth to prevent burning.
- → Can I substitute any nuts or omit them for allergies?
Yes, pistachios can be replaced with other nuts or left out entirely to accommodate nut allergies without compromising texture.
- → How should I arrange the sweets and fruits for balance?
Arrange fruits and sweets symmetrically on opposite sides, alternating textures and colors to create a visually appealing display.
- → What tools are recommended for drizzling chocolate decoratively?
Use a spoon or piping bag to create elegant lines or swirls of melted chocolate over the platter for a polished finish.
- → How to adapt this platter for gluten-free needs?
Replace regular cookies and brownies with gluten-free versions to maintain texture and taste suitable for gluten-sensitive guests.