 Save to Pinterest
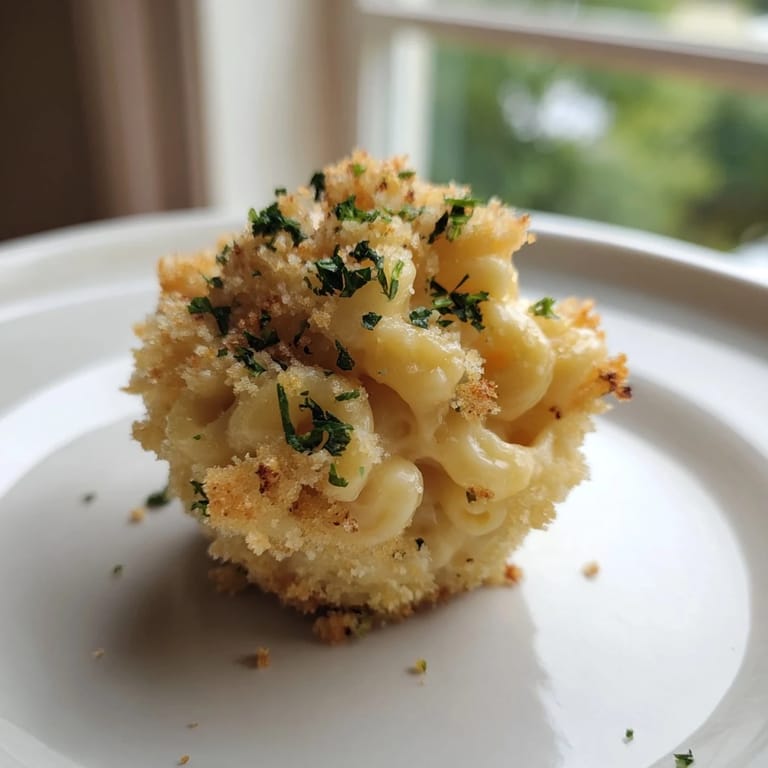
 My friend texted me a photo of her daughter's lunchbox, completely empty except for crumbs, and asked what magic I'd performed. It was these tiny mac and cheese muffins—golden, crispy-topped, and utterly impossible to resist. I'd been experimenting with ways to make comfort food more portable, tired of the mess of traditional casserole and the boredom of regular pasta. One afternoon, while staring at a muffin tin, it clicked: what if I could bake mac and cheese into handheld bites with the best part—that golden crust—on every single one? It became an instant obsession.
The first time I brought these to a potluck, I watched a grown man go back for thirds while quietly asking if I'd made them myself. When I said yes, his expression shifted—like I'd unlocked some secret password. Someone's partner stole one straight off the cooling rack, burned the roof of their mouth, and immediately went back for another. That's when I knew these weren't just clever; they were genuinely crave-worthy.
Ingredients
- Elbow macaroni (200 g / 7 oz): Cook it just under al dente—those extra seconds of chew matter when it's baked again in the oven.
- Unsalted butter (2 tbsp + 1 tbsp melted): Using unsalted gives you control over seasoning and lets the cheese flavor sing without salt competing.
- All-purpose flour (2 tbsp): This becomes your sauce foundation; don't skip the minute of cooking it in butter, it removes the raw flour taste.
- Whole milk (240 ml / 1 cup): Full-fat milk creates a silkier sauce; if you use lower-fat milk, the sauce can feel thin and watery.
- Sharp cheddar cheese (100 g / 1 cup shredded): Sharp, not mild—it has the backbone to stand up to baking and keeps the flavor bold.
- Mozzarella cheese (40 g / ⅓ cup shredded): This is your secret weapon for stretchy, creamy texture; it melds beautifully with cheddar.
- Parmesan cheese (40 g / ⅓ cup grated + 2 tbsp for topping): The nuttiness adds depth and helps the topping crisp up gorgeously.
- Dijon mustard (½ tsp): A small amount brightens the cheese without making it taste mustard-y; it's a silent flavor booster.
- Garlic powder, onion powder, salt, and black pepper: These season the sauce subtly so the cheese remains the star.
- Panko breadcrumbs (50 g / ½ cup): Panko stays crunchier than regular breadcrumbs; it's worth buying if you don't have it.
Tired of Takeout? 🥡
Get 10 meals you can make faster than delivery arrives. Seriously.
One email. No spam. Unsubscribe anytime.
Instructions
- Preheat and prep:
- Set your oven to 200°C (400°F) and get your 12-cup muffin tin ready with a light coating of butter or nonstick spray. Having everything ready before you start makes the actual cooking feel effortless.
- Cook the pasta:
- Boil your salted water and add the elbow macaroni, cooking it about one minute under the package instructions—this matters because it'll get another round of heat in the oven. Drain it really well; excess water is the enemy of a creamy sauce.
- Build your roux:
- Melt the butter over medium heat, add your flour, and stir constantly for one full minute until it smells a little toasted and nutty. This cooking-out step is what separates a silky sauce from a gluey one.
- Create the sauce base:
- Slowly pour in the milk while whisking—this is where patience matters, and your whisk becomes your best friend to avoid lumps. Keep going until the sauce thickens and coats the back of a spoon, about 3-4 minutes.
- Add the cheese and seasoning:
- Remove from heat (this is important—direct heat can make cheese grainy), then stir in all three cheeses plus the mustard and spices. The sauce should feel creamy and smell absolutely incredible.
- Marry pasta and sauce:
- Fold the drained pasta into your cheese sauce, making sure every piece gets coated. This is where it goes from components to actual comfort food.
- Fill the muffin tin:
- Divide the mixture evenly among the 12 muffin cups, pressing down gently to pack them in without crushing the pasta. Each muffin should feel substantial and full.
- Make the crispy top:
- Combine your panko, melted butter, and Parmesan in a small bowl, then sprinkle this golden mixture over each cup. This is what turns these from nice to irresistible.
- Bake to golden:
- Slide them into the oven for 15-18 minutes until the tops turn a deep golden brown and feel crisp when you tap one gently. Set a timer—this is where the magic happens.
- Cool and release:
- Let them rest in the tin for 5 minutes (they're still fragile at first), then run a thin knife around each edge and lift gently. A few moments of patience here prevents breakage.
 Save to Pinterest
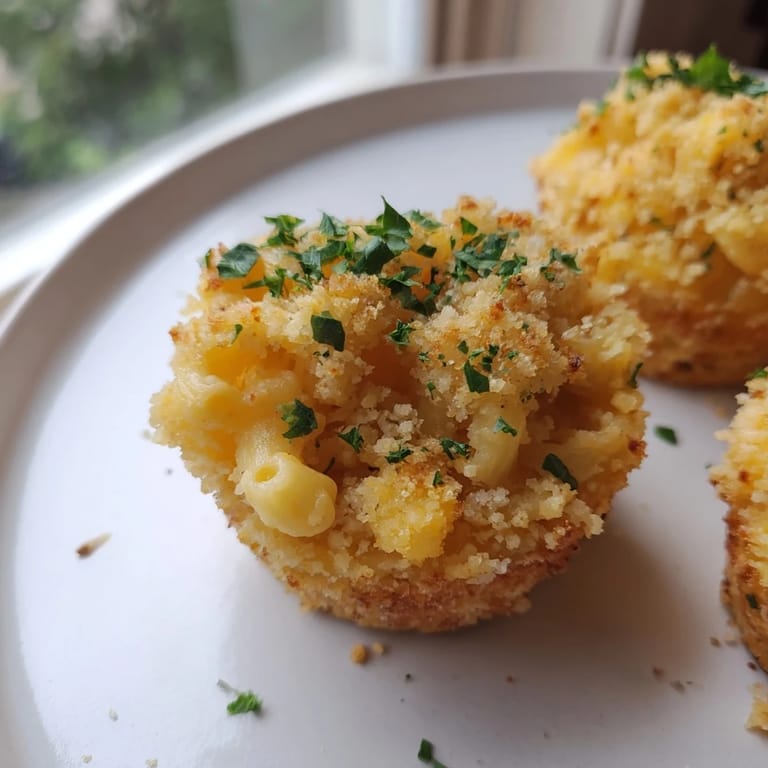
 I realized these had become something special when my neighbor started asking me to bring them to every gathering, and my dad (who claims not to like anything I cook) asked for the recipe. It stopped being just food and became a quiet way of showing up for people.
Flavor Variations Worth Trying
The beauty of this recipe is how it welcomes tinkering. Adding a pinch of smoked paprika to the sauce gives everything a subtle campfire depth, while swapping sharp cheddar for Gruyère creates something almost restaurant-worthy. I once stirred in a small spoonful of whole grain mustard instead of Dijon and discovered it added a welcome textural surprise. The cheese sauce is flexible enough to accommodate your preferences but strong enough to hold its own against whatever you add.
Make-Ahead and Storage Secrets
These muffins genuinely improve when made a day ahead—the flavors meld overnight and the texture sets perfectly. Cool them completely, then store in an airtight container in the refrigerator for up to four days. Freezing them raw (after filling the muffin tin but before baking) also works beautifully; just add a few extra minutes to the baking time if baking from frozen. Reheating is painless: pop them in a 180°C (350°F) oven for about 10 minutes until warmed through and the tops crisp back up.
Why This Works as Both Comfort and Celebration
There's something about the muffin shape that makes people take them seriously as food—they feel less casual than a casserole, more special than pasta, and far more exciting than any sandwich. Kids love the portability and the psychological win of getting a whole muffin to themselves. At parties, they disappear in minutes, and people often can't quite explain why they're so addictive until they realize it's the perfect ratio of creamy to crispy in every single bite.
- These work as appetizers, side dishes, or the main event depending on your needs.
- Double the recipe and freeze half for genuine weeknight wins during busy seasons.
- Serve them slightly warm rather than piping hot—the flavors are clearer and they're easier to handle.
 Save to Pinterest
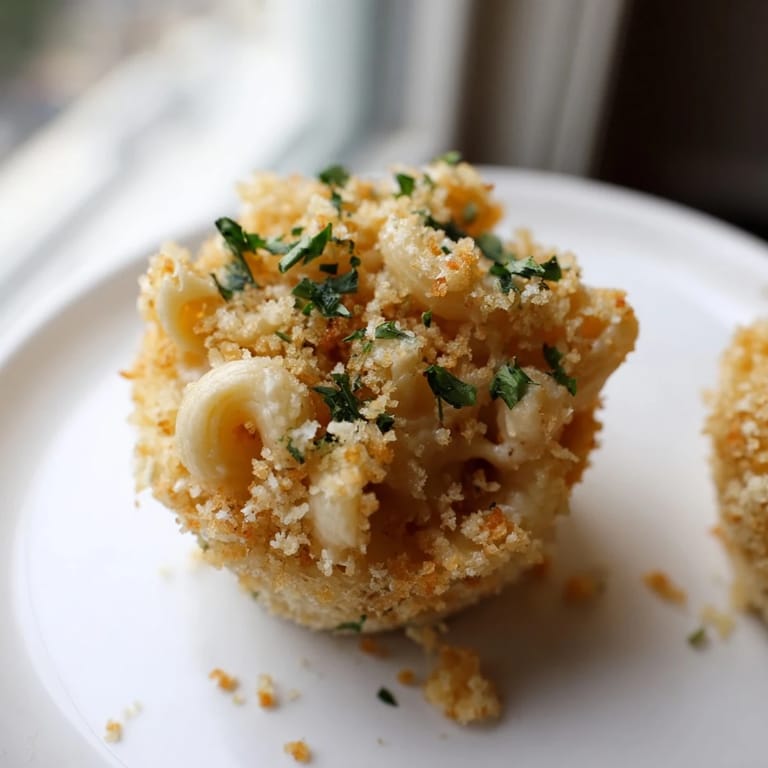
 These little golden muffins have a way of making ordinary days feel a bit more celebratory. Whether you're packing them for a lunchbox or bringing them to share, they're proof that comfort food doesn't have to be complicated.
Recipe Q&A
- → What pasta works best for these mini muffins?
Elbow macaroni is ideal due to its size and shape, which holds the cheese sauce well and fits perfectly into muffin cups.
- → Can I substitute the cheese varieties?
Yes, swapping cheddar for Gruyère or Monterey Jack can add different flavor profiles while maintaining creaminess.
- → How do I achieve a crispy topping?
Mix panko breadcrumbs with melted butter and Parmesan cheese, then sprinkle on top before baking to get a golden, crunchy crust.
- → Can these be prepared ahead of time?
They can be made in advance and reheated in a 180°C oven for about 10 minutes to regain freshness and crispness.
- → Are these suitable for vegetarians?
Yes, this dish uses vegetarian-friendly ingredients such as cheeses without animal rennet and common pantry staples.
- → What seasoning enhances the cheese sauce?
Adding Dijon mustard, garlic powder, onion powder, and a hint of black pepper elevates the sauce’s flavor complexity.