 Save to Pinterest
 The first time I came across Cloud Eggs, I remember hearing the sizzle of eggs in the oven while chatting with a friend over coffee on a lazy Saturday. The kitchen filled with that uniquely toasty scent of baking whites and subtle Parmesan, instantly making my mouth water. It wasn’t about showing off—just about trying something delightfully different. As soon as those golden yolks were nestled atop their pillowy whites, I realized breakfast could be as playful as it was nourishing. There’s something quietly magical about seeing clouds on your plate as sunlight pours through the window.
I whipped up these cloud eggs for my partner on a rainy morning, music humming softly in the background. We laughed as the egg whites billowed and tumbled, and when we finally tasted the airy result, we both agreed—breakfast was now something to look forward to. Since then, it’s been our small ritual whenever a gentle start is needed.
Ingredients
- Eggs: Use fresh, large eggs because their whites whip up with better volume and the yolks hold together beautifully.
- Salt: A tiny pinch draws out the egg flavor—I learned not to skip it.
- Freshly ground black pepper: Adds just enough heat without masking the lightness of the dish.
- Optional cheese (Parmesan or cheddar): Finely grated cheese melts into the whites for a savory, slightly nutty backdrop; don’t overdo it or the whites will sink.
- Optional herbs (chives or parsley): Freshly chopped herbs add color and a hint of brightness; chop them small so they mingle seamlessly with the eggs.
Tired of Takeout? 🥡
Get 10 meals you can make faster than delivery arrives. Seriously.
One email. No spam. Unsubscribe anytime.
Instructions
- Set the scene:
- Heat your oven to 450°F (230°C) and line a sheet with parchment paper while everything feels calm and unhurried.
- Egg separation magic:
- Gently scoop out each yolk and nestle it in its own bowl, letting the whites fall into another—this is a small moment of care that pays off later.
- Whip the whites:
- Whisk the egg whites on high until they form billowy, impressive peaks; the kitchen grows quieter as you watch transformation happen before your eyes.
- Blend in flavor:
- Scatter in salt, pepper, and any cheese or herbs, folding carefully so every spoonful stays cloud-light.
- Build your clouds:
- Spoon fluffy mounds onto the parchment, then use a spoon to create a deep well in the center of each for the yolk.
- First bake:
- Slide them into the oven for 3 minutes so the exteriors firm up but stay tender inside.
- Add the gold:
- Drop a yolk gently into each well, almost like a jewel in a pillow, then return to the oven for another 3 to 5 minutes, just until the center shivers but doesn’t set hard.
- Serve and savor:
- Lift your clouds carefully onto plates, scatter with herbs, and eat at once while they’re lofty and warm.
 Save to Pinterest
  Save to Pinterest
 One quiet afternoon, I made these for my niece, who was convinced food couldn’t look fun. She nicknamed them “breakfast puffs” and immediately announced to her parents that they needed to learn my “egg magic.” That moment turned an ordinary meal into something bright we still talk about anytime eggs are on the table.
How Cloud Eggs Became a Favorite in My Kitchen
After seeing them online, I finally built up the nerve to try cloud eggs during a family brunch. Watching everyone pause and grin, then playfully poke the yolk, made me realize how food can turn a dreary morning into something nearly celebratory. Their lightness feels like a gentle joke—they disappear so fast, you’ll wish you made more.
Little Details Make a Big Difference
I used to rush through separating the eggs, only to find deflated clouds later. These days, I slow down and use my fingers instead of the shells—it’s less showy, but far fewer breaks. Even the parchment paper matters; without it, the clouds can stick and lose their charm.
Making These Your Own (and Avoiding Sneaky Pitfalls)
Experimenting with add-ins like cooked mushrooms or swapping herbs helps keep things fresh every weekend. I once tried to double the batch too quickly and learned they deflate if left sitting before baking. Treat each batch with a bit of patience, and breakfast will always feel like a small gift.
- Add spices like smoked paprika for a new twist.
- Serve on artisan toast for extra crunch.
- Watch the last minutes of baking closely for perfect yolks.
 Save to Pinterest
 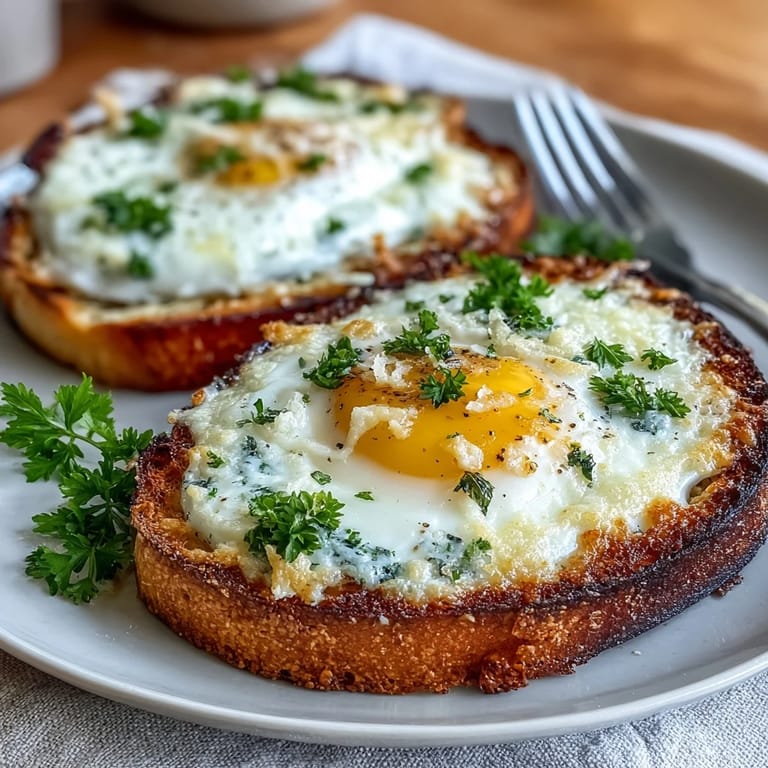 Save to Pinterest
 Cloud eggs are such a simple pleasure—they never fail to bring a little surprise to the table. Try them on a gray morning or for any brunch that needs a playful twist.
Recipe Q&A
- → How do I get firm, glossy stiff peaks?
Use a clean, dry bowl and beaters, start on medium then increase to high, and beat until the whites hold a pointed peak. Any trace of fat or yolk will prevent proper whipping.
- → Can I prepare the whites ahead of time?
Whipped whites are best used immediately for volume. If needed, whip then briefly chill for up to 30 minutes, but expect some loss of loft; gently re-whip a few seconds before shaping if necessary.
- → How do I control yolk doneness?
Bake the whites alone for 3 minutes, add yolks, then bake 3–5 minutes. Shorter time yields runny yolks; add a minute or two for firmer yolks. Oven temperatures and yolk size will affect timing.
- → What are good flavor additions?
Fold in finely grated Parmesan or cheddar, chopped chives or parsley. Stirring in crispy bacon bits, diced ham, or sautéed mushrooms before baking adds savory depth.
- → What should I serve them on?
They’re lovely on toasted bread to catch the yolk, or paired with a simple green salad for a light brunch. A smear of butter or ripe avocado works well too.
- → Any tips to prevent spreading?
Use cold, lined baking sheets and mound the whipped whites high, shaping a deep well for the yolk. Stiffer peaks and a brief initial bake help maintain the cloud shape.